
[ Shopify ]
How to Migrate a Website to Shopify (Without Losing Sales or SEO)
Moving an online store to Shopify from WordPress, Wix, Squarespace, Magento or a custom site follows the same safe pattern. Here’s the step-by-step plan.
We build the funnels, stores and CRMs we write about — this isn't outsourced content.

Short answer: to migrate a website to Shopify, decide what to move, import products first, then customers, then past orders, set up your theme, payments, shipping and taxes, run test orders, and create URL redirects from every old address before you switch the domain. Redirects are what protect your Google rankings; test orders are what protect your sales.
The plan below works whatever you’re moving from — WordPress, Wix, Squarespace, Magento, BigCommerce or a custom-built site. It follows the order Shopify itself recommends in its guide to migrating to Shopify, with the checks we add on real projects.
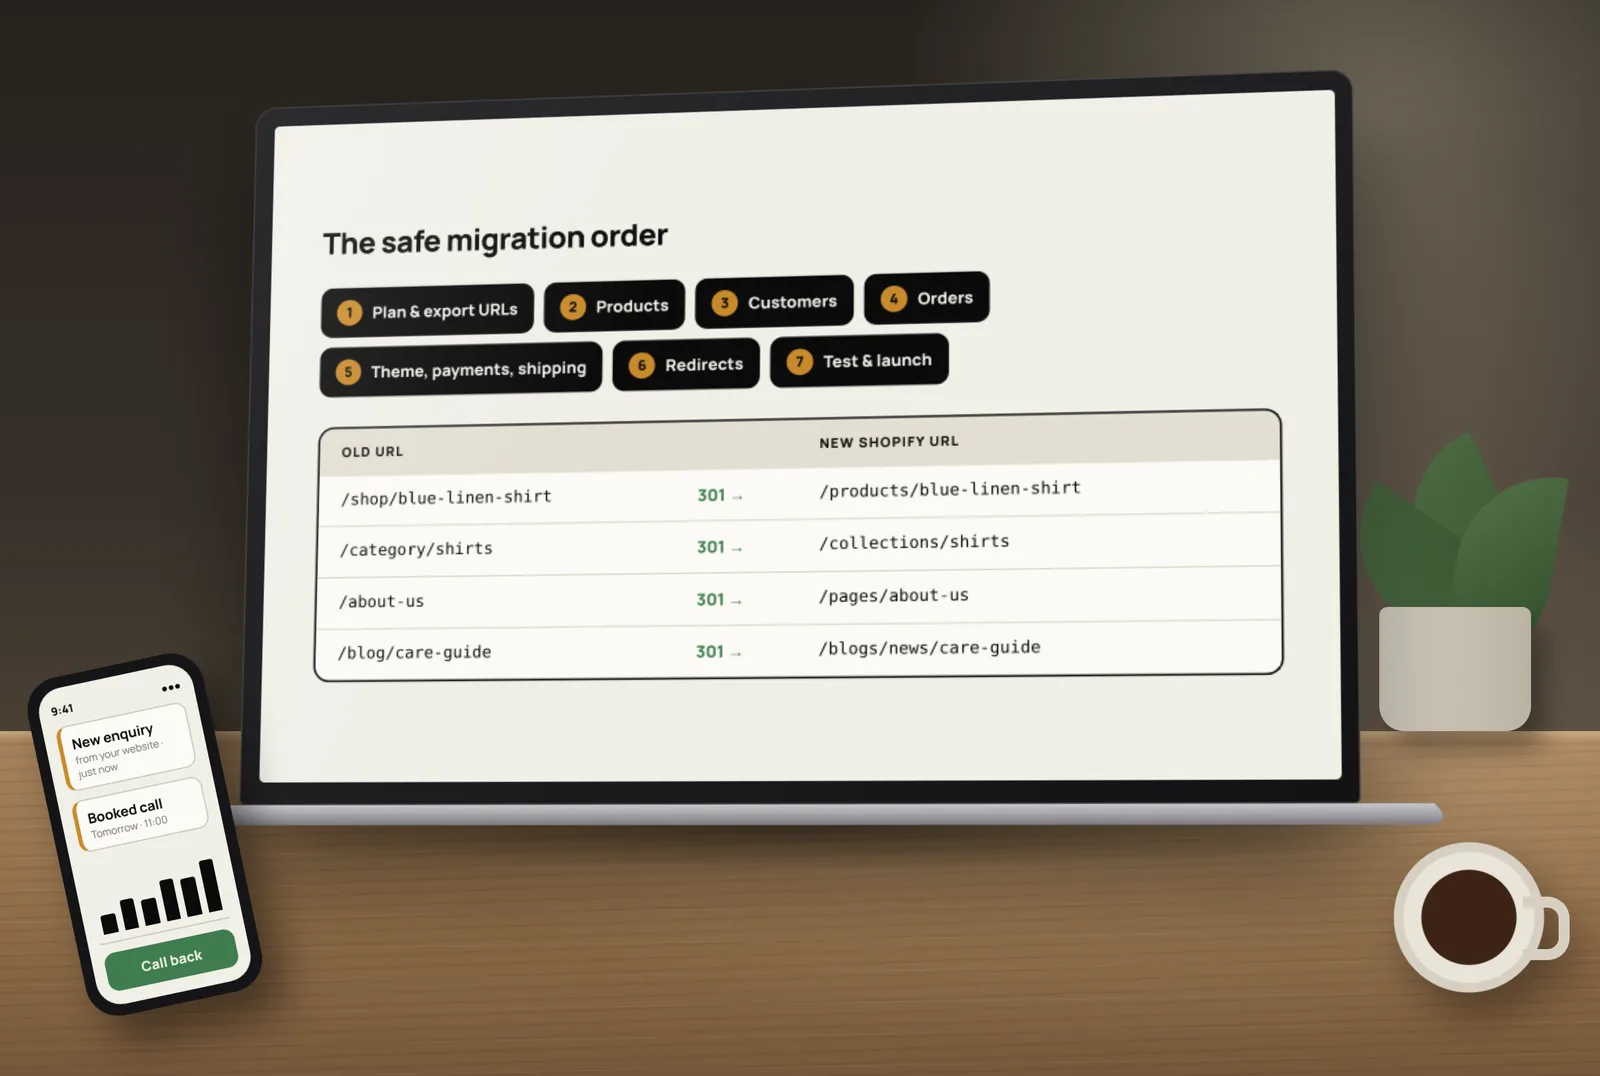
Step 1: Plan what you’ll move
- Products — titles, descriptions, images, variants, prices, SKUs, stock and weights.
- Customers — names, emails, addresses and marketing consent.
- Past orders — useful for customer history and reporting.
- Content — pages, blog posts and their images.
- Gift cards and store credit — if you offer them.
- SEO data — page titles, meta descriptions and every URL that gets traffic or links.
Step 2: Choose how to import each type of data
Shopify lists several methods: copying content by hand, CSV files, a migration app such as its Store Migration app, a Shopify Partner, or a custom solution using the API. Most migrations mix them — CSV or an app for products and customers, manual copying for a few key pages.
Step 3: Import in the right order
- Products first, so orders can link to them.
- Customers next.
- Historical orders last. Shopify suggests turning off order notifications first if you don’t want staff emails for every imported order.
- Check a sample after each import — prices, weights, stock, variants and whether products are published.
- Organise products into collections and confirm inventory settings.
Step 4: Set up the store
- Theme — choose and customise it, and rebuild key pages.
- Payments — activate your payment provider and test it.
- Shipping — zones, rates and package sizes if you use live carrier rates.
- Taxes — set up for the places you ship to, with your accountant’s advice.
- Policies — refund, privacy, terms and shipping pages.
- Staff accounts — one login per person with the right permissions.
- Apps — only the ones you need; see our Shopify SEO checklist for SEO settings to get right.
Step 5: Map and create URL redirects
Shopify uses fixed URL patterns such as /products/, /collections/, /pages/ and /blogs/, so most old URLs will change. Every old URL that matters needs a 301 redirect to its closest new page. Shopify’s help page on creating URL redirects explains how to add them one by one or import them in bulk from a CSV.
- Redirect each old product to its new product, not to the homepage.
- Redirect old categories to matching collections.
- Redirect old blog posts and pages to their new versions.
- Avoid redirect chains (old → older → new).
- Keep the redirect list for future checks.
Our website redesign checklist explains redirect mapping and post-launch SEO checks in more detail.
Step 6: Test everything before launch
- Place test orders: successful payments, failed payments, refunds and cancellations.
- Check shipping rates and taxes for several addresses.
- Test discount codes and gift cards.
- Check every email customers receive (order confirmation, shipping, password reset).
- Test on mobile and desktop.
- Spot-check redirects from your URL list.
Step 7: Launch and switch the domain
- Pick a quiet day and time for the switch.
- Do a last import of orders and customers created since your first export.
- Connect your domain to Shopify (or transfer it), and set the primary domain.
- Remove any storefront password.
- Submit your new sitemap in Google Search Console.
Step 8: Watch closely for the first few weeks
- Check Search Console for 404 errors and add missing redirects.
- Compare organic traffic and sales with the weeks before.
- Watch site speed as you add apps.
- Ask customers who had accounts to reset their passwords if needed — customer passwords usually can’t be moved between platforms.
Common Shopify migration mistakes
- No redirect map, so rankings and links are lost.
- Redirecting everything to the homepage.
- Importing orders before products and customers.
- Forgetting product weights, so shipping rates are wrong.
- Not testing payments and emails before launch.
- Switching the domain on a busy sale day.
Prefer to have it done for you? Tocal has delivered 120+ projects, including Shopify builds and migrations. Our Shopify service covers data import, theme setup, redirects, testing and launch — with fast delivery and reasonable pricing. Book a free call to plan your move.
Frequently asked questions
Plan what to move, import products, then customers, then past orders, set up your theme, payments, shipping and taxes, run test orders, create URL redirects, then connect your domain and submit your sitemap.
Not if you redirect every important old URL to its closest new page, keep page titles and content, and submit your new sitemap. Missing redirects are the main cause of lost rankings.
Products, customers, past orders, pages, blog posts and gift cards can be moved using CSV files, a migration app, manual copying or the API, depending on your old platform.
Shopify recommends products first, then customers, then historical orders, so orders link correctly to products and customers.
In your Shopify admin, add URL redirects one at a time or import them in bulk from a CSV file with old and new paths.
Usually not, because passwords are stored securely and can’t be exported. Customers may need to set a new password or use Shopify’s account invite after the move.
Yes. The same steps apply: export your data, import it into Shopify, rebuild pages, set up redirects and test before switching the domain.
Yes, in most cases. Keeping your domain and redirecting old URLs keeps your brand and search history.
Watch Search Console for 404 errors, compare traffic and sales with before, check site speed and make sure order emails and payments work as expected.
Yes. We plan the migration, import data, set up the theme and settings, create redirects, test and launch.
[ Tags ]
- Shopify
- Migration
- SEO
- E-Commerce
- Replatforming
[ Need a hand? ]
Let Us Build It For You.
30 minutes, no pressure — we’ll look at your setup and tell you honestly what to fix first.
[ Keep reading ]

[ SEO ]
Local SEO for Jaipur Businesses: How to Show Up in Google Maps
Most Jaipur customers search on their phone and pick from the three businesses in the Google Maps box. Here’s how to earn a place there, step by step.

[ E-Commerce ]
Shopify vs WooCommerce for Indian D2C Brands: Full Cost Comparison
For an Indian D2C brand, the real difference between Shopify and WooCommerce is not the plan price — it’s what you pay on every order as you grow. Here’s the full picture.